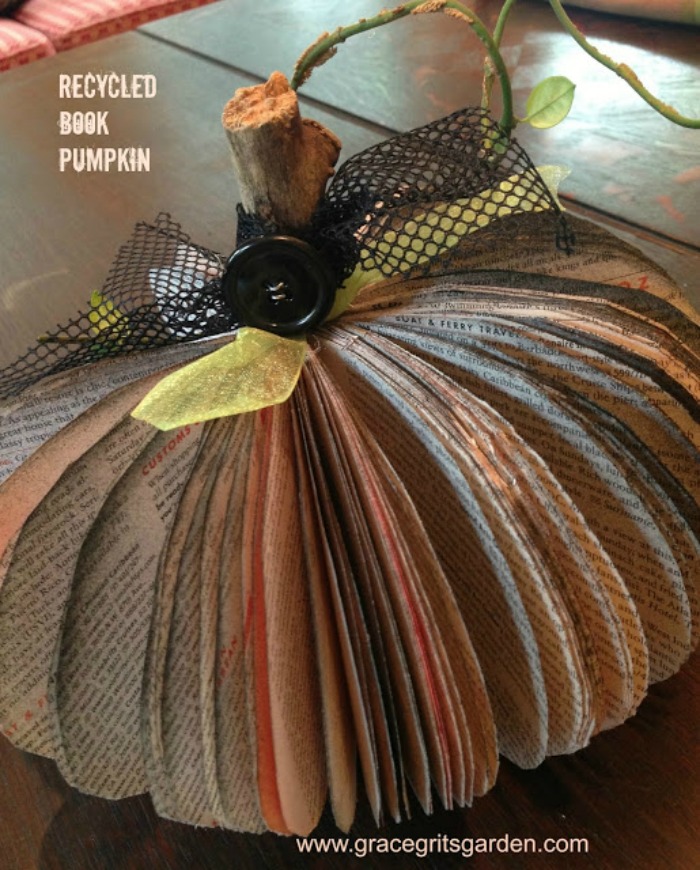
Once September rolls around, I am all about decorating for Halloween. I saw a similar recycled book pumpkin project on Pinterest and couldn’t wait to try it.The hardest part of the project for me was selecting which book to use. ‘Defacing’ a book is downright sinful; however, I decided an old Fodor travel book on the Caribbean was expendable. If I return to the islands, I’ll buy a more up-to-date issue.
Step One
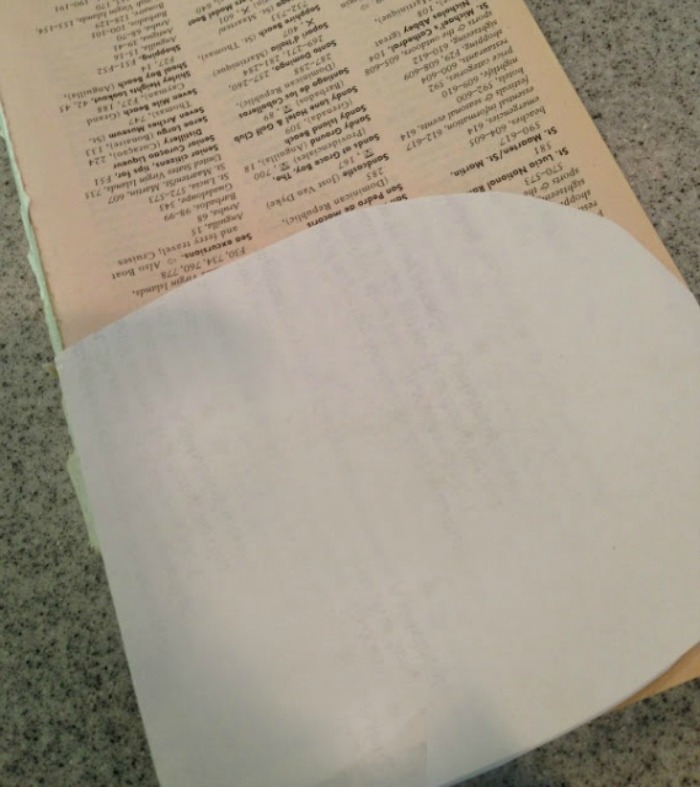
Draw a pumpkin shaped template on a piece of paper. Fold it in half and trim it so that the sides are symmetrical. (Don’t over think this step. I drew mine free-handed.) Make sure the template isn’t larger than the book you will be using. (The template is almost heart-shaped, but the bottom is flat…)
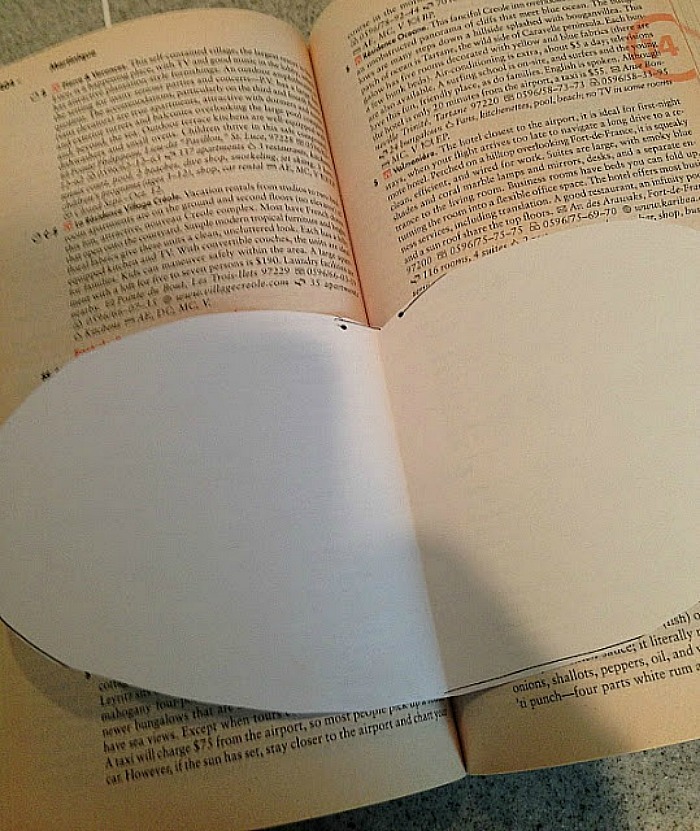
make sure your template isn’t bigger than your book
Tear the front and back covers from the book. (I know, this will be painful for book lovers.)
Step Three
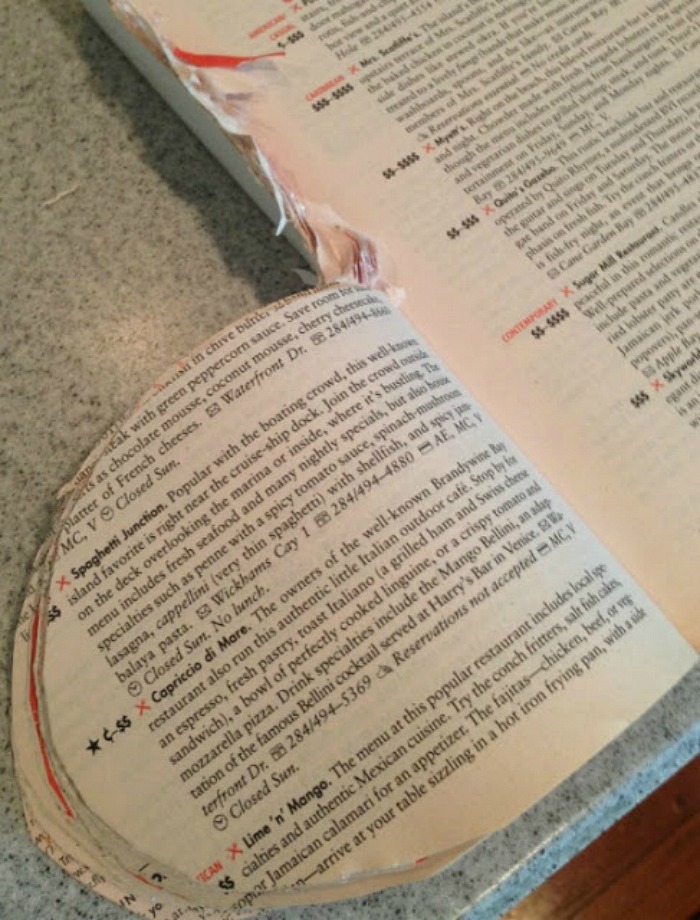
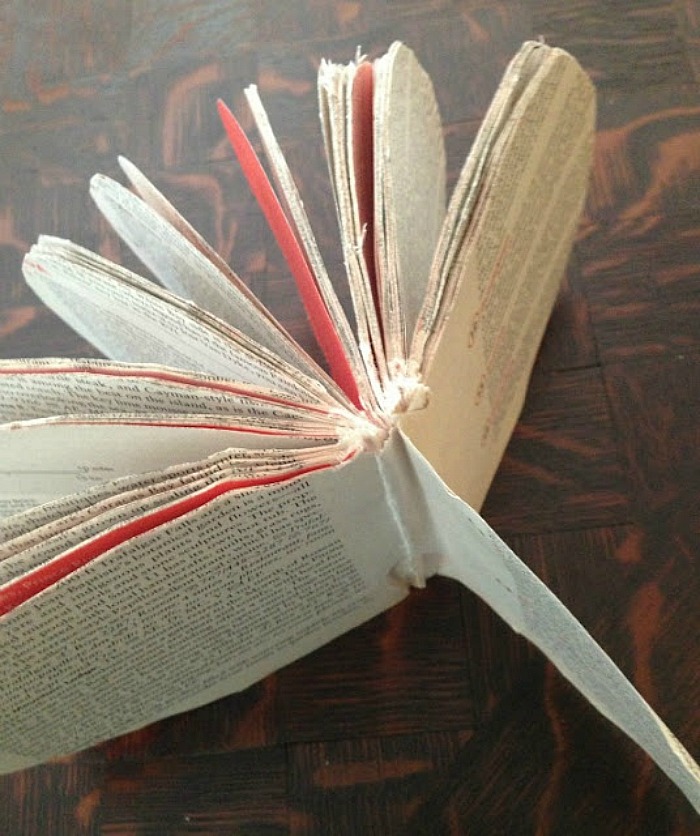
Cut through the pages—about ten pages at a time depending on the sharpness of your scissors. Tear the cut pages away from the spine of the book as you go and repeat with another group of pages.
Step Four
Continue cutting pages until the entire book is cut into the shape of a pumpkin. Trim any jagged edges, but don’t worry about making it perfect. This is a recycled book pumpkin… Besides, when have you ever seen a perfect real pumpkin?
Step Five
Near the spine of your pumpkin-shaped book, glue the first and last pages together with hot glue. This will open the book into a round shape.
Set your pumpkin upright and begin ‘fluffing’ the pages—moving and opening the pages around. Some pages may be stuck together. Play around with it until the pages are separated and the pumpkin is full and fat.
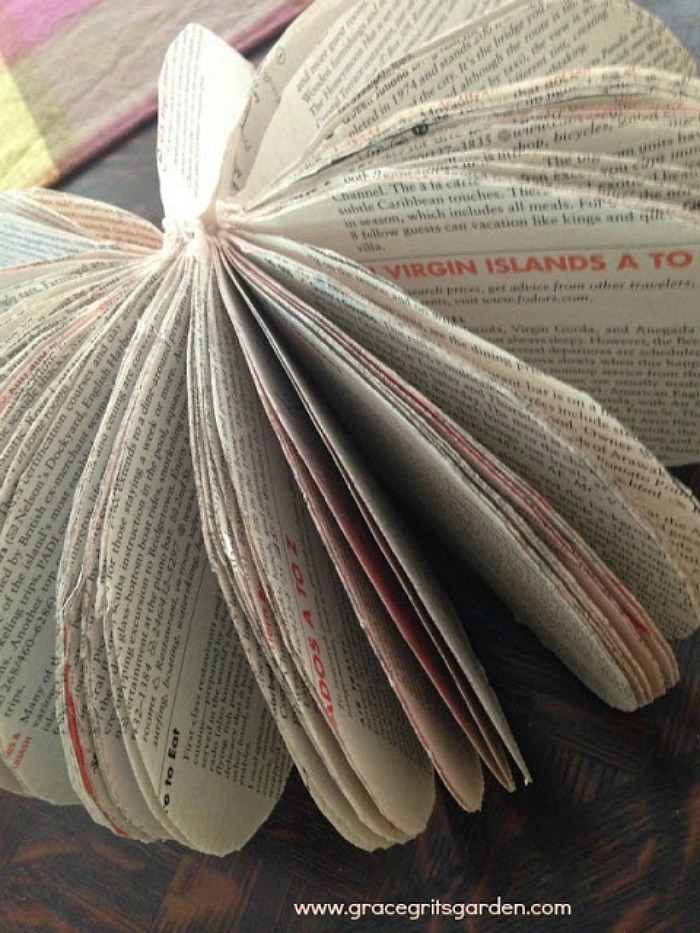
I love the way my recycled book pumpkin turned out. What do you think?
Grace Grits and Gardening
Farm. Food. Garden. Life.


Love, love, love! It looks SO cute. I’m the same way-once it gets to be September I’m all about fall and pumpkins. I’d love to share your project with my Month of Pumpkin series that begins in October 🙂
Oh that would be great Gina!
Seriously, if our neighborhood didn’t have home tour during mid-September, I would start decorating for Halloween tomorrow!
What a cute decoration for fall! I can’t wait until fall so I can watch the leaves turn colors.
Thanks so much for linking this up to Frugal Crafty Home! I’m glad you found several inspiring ideas to pin! Our next hop goes live tomorrow at 8pm central time & we’d love to have you back!
Thank you Carrie! I’m waiting for fall too:)) I look forward to linking up again soon.
Okay, you move into one of the most talented people I know category. This is awesome!
Wow thanks Jimmie. I admit I was quite proud of the way this turned out:)
Love them both! Will definitely try hand at it, partly because you make it sound so easy!
I wish we had time to make them when you were here. A fun project! Let me know how yours turns out.
These are very pretty! Did you know that you are a no-reply blogger?
I’ve had this problem before but corrected it. I think I’ve corrected it again. Thanks!
This is so clever and cute! Great tutorial Would like to invite you to come by and share at One More Time http://www.onemoretimeevents.com/2013/10/one-more-time-share-it-one-more-time.html Tammy
Thank you will do!
Oh, I love your adorable book pumpkin and your fabulous blog! Thank you so much for sharing with us at A Bouquet of Talent. I will be featuring your pumpkin to day at Pick of the Bunch! New follower, too! Can’t wait to check out more of your blog!
Have a wonderful weekend!
Hugs
Kathy
Oh thank you so much Kathy!
When I was little, about 50 years ago, my mom did this to make angels for Christmas. She used old Sears catalogs, old Kansas City phone books, and old Readers’ Digest magazine, just to give ideas. I have old paperbacks that I inherited cheap at an auction, and threw away because they were “westerns”, but now wish I’d kept. Any largish book that arrives annually, such as a writers’ guide, might do just fine.
I love these, though! Is there any way it could be quicker, like if we cut through the whole book at once with a really good knife? Just thinking…
Thanks for the ideas! 🙂
Oh I love the idea of angels! I do think you could make this quicker with a sharp knife. I had a dull pair of scissors – LOL. I will say the second book I made took very little time at all because I knew what I was doing:)) Also, the Fodor’s book I used had something like 700 pages. I made both pumpkins out of the one book. When I thought I had cut enough for the first pumpkin, I ripped off the rest of the book and saved it for the second pumpkin.
Oh I love the idea of angels! I do think you could make this quicker with a sharp knife. I had a dull pair of scissors – LOL. I will say the second book I made took very little time at all because I knew what I was doing:)) Also, the Fodor’s book I used had something like 700 pages. I made both pumpkins out of the one book. When I thought I had cut enough for the first pumpkin, I ripped off the rest of the book and saved it for the second pumpkin.
Such a cool idea thanks for sharing , I’ve got to try this..
We made Christmas trees out of two old Readers’ Digest. No cutting involved. Just fold the pages, taking the top outside corner & pulling it to the spine of the book ( like a really big “dogear”) firmly crease the fold. Continue using the entire book (using the covers) Paper clip the books together at the top & bottom. Spray with the color of your choice (we used green). While the paint is still wet sprinkle with glitter. to better secure the glitter you can spray with a light coat of clear coat. Finish it off with the decorations of your choosing, or top it off with an angel or star & call it a day!
Would love to see pictures!
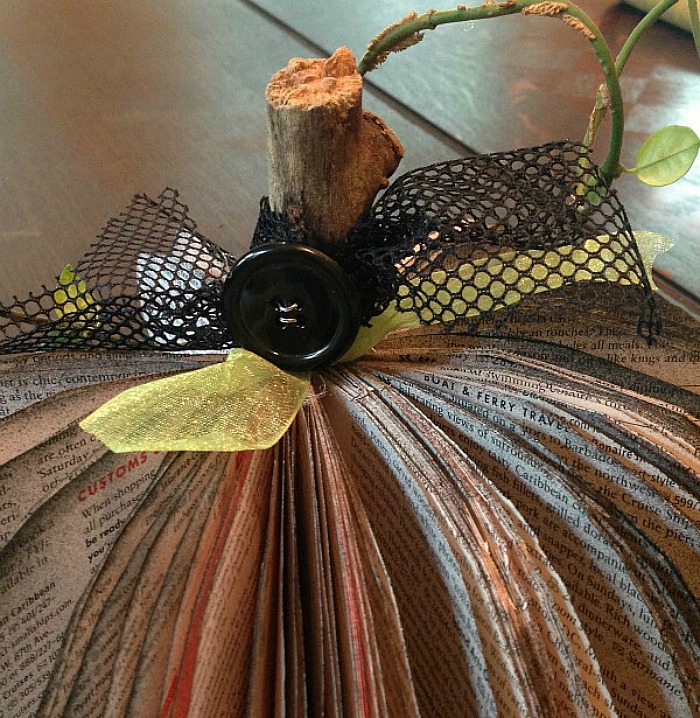
I was reading the other day about someone who saves real pumpkin stems to use in a similar project. She goes around and ask farmers if she can have them from unsold pumpkins. Thought that was a neat idea:)
That is neat!