grace grits and gardening

ramblings from an arkansas farm girl

  • Home
  • Bio
  • Publishing
  • SHOP!
  • Garden
  • Food
  • Reading & Books
  • Sunday Letter

Arranging a Photo Wall Display for Impact

October 15, 2014 By Talya Tate Boerner

In our Dallas house, we filled our entire stairwell space with a wall display of black and white family photos. It worked well in a space that would have otherwise been boring and blank.

Photos Along Stairs
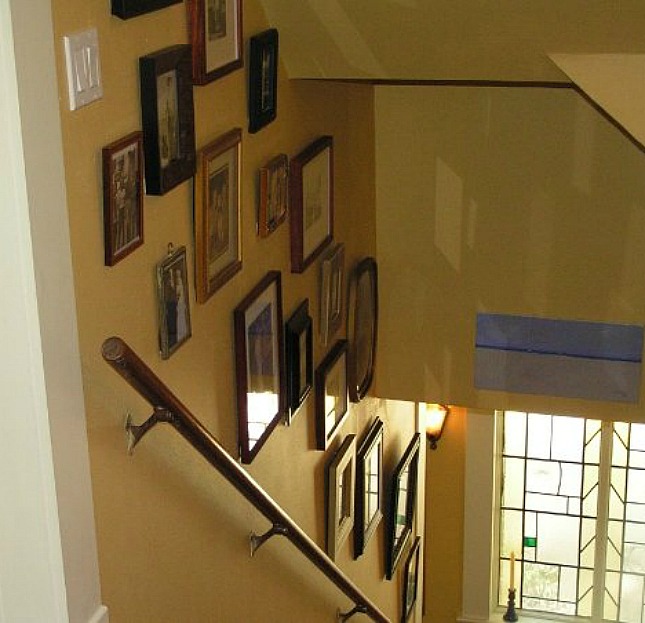
Although for years we enjoyed the look, I wanted something different for our new Fayetteville home. Plus our Fayetteville stairwell is very narrow. I imagined if we hung our photos along the stairs, we would constantly brush against them resulting in forever straightening picture frames. That would make me crazy.

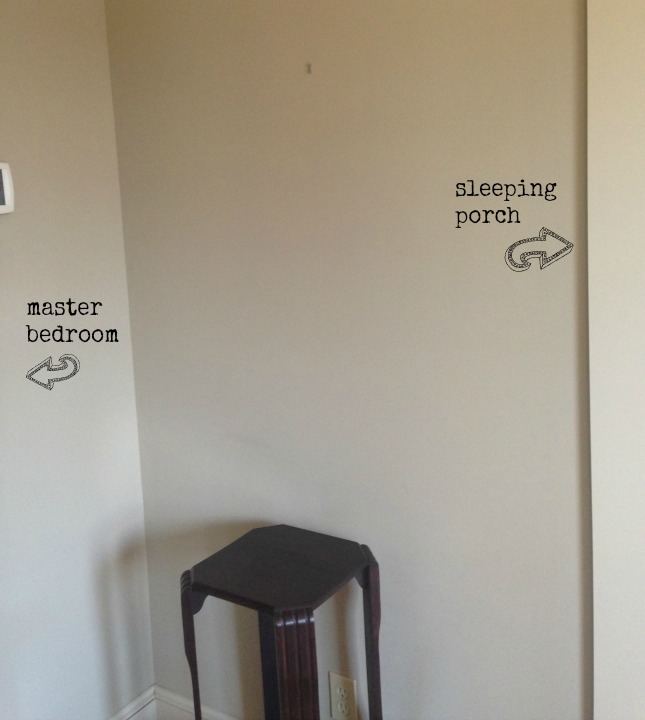
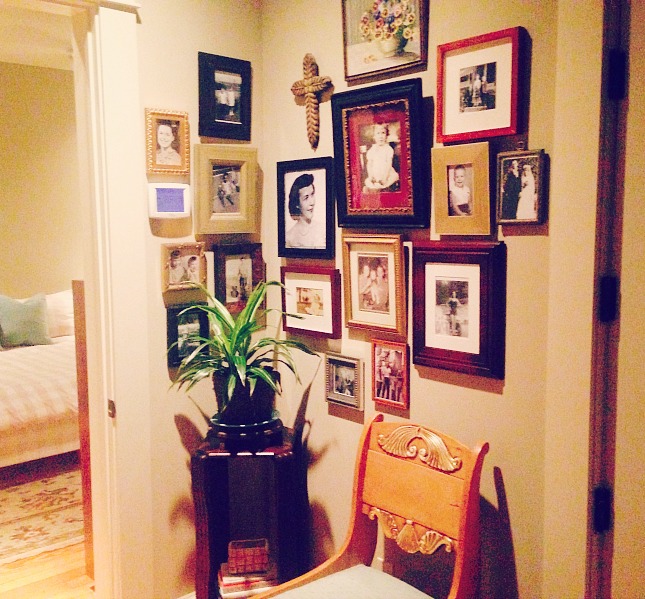
Instead, we chose an empty corner just outside our bedroom.

Empty Wall - Perfect spot for wall grouping

First off, this is not a post about how to measure so that you end up with flawlessly positioned frames. There are tons of pictures on Pinterest about templates and measuring if you are a stickler for perfectly aligned pictures. I’m just not that worried about it. Ask my husband…I think I make him nervous with my free-spirited hammering.

Unless we are hanging a heavy piece of artwork that involves screws and toggle bolts, I do minimal measuring and try not to sweat it. The only real “prep” I do is placing photos on the floor to roughly decide an arrangement. And the arrangement never ends up the way it starts. Even so, I do have a few tips that work for me.

1.) Pick a prominent frame/photo to serve as the focal point. 

arranging a photo display - start by laying pictures on the floor

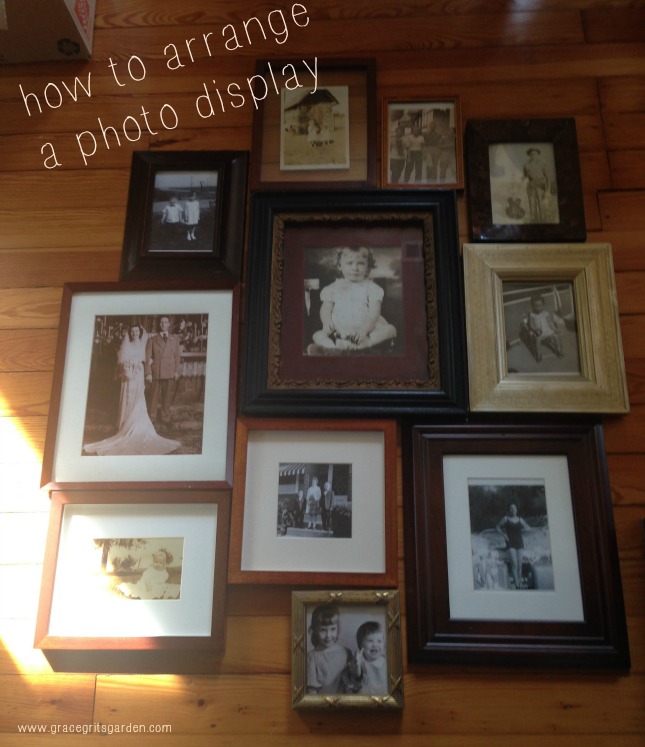
my original general design laid out on the floor


2) Locate the center of your space (sometimes I measure this). Once I hang the focal point photo, I typically abandon my first arrangement and begin holding up various photos until I find the next one that speaks to me. (You can use Command Strips if you are worried about nail holes, but I use picture hangers.)

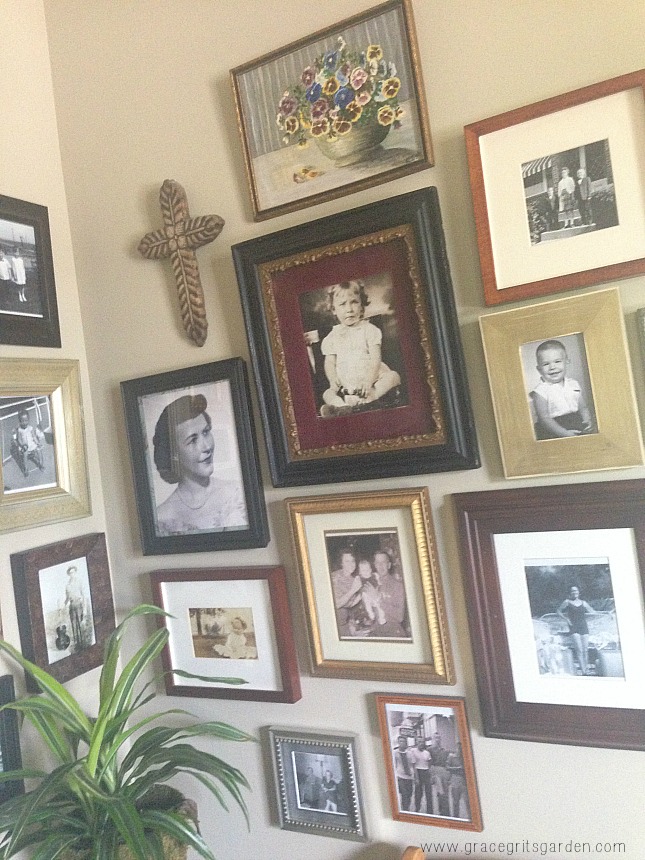
3.) Hang photos 1-2 inches apart for a stylish, modern look that doesn’t seem contrived. I like to think of my style as Elle Decor meets Billy Reid, a bit eclectic yet not too over the top.

4.) After hanging a few of the center photos, live with the look for a few hours before adjusting or adding more. If something is off, you will notice. If you have a large collection of framed photos like I do, usually switching out the picture with a different sized frame will rebalance the look (rather than making another nail hole).

5.) Keep frames and photos in the same color family. They don’t have to be identical in shape, color, material, but they should complement each other. I used different color wood, antique frames, black and white and sepia toned photos.

6). Break the look up with something different to add interest. I hung a wooden cross and small vintage oil painting.

7.) Wrap the wall with photos to make an impact in a small space.

how to arrange a photo display

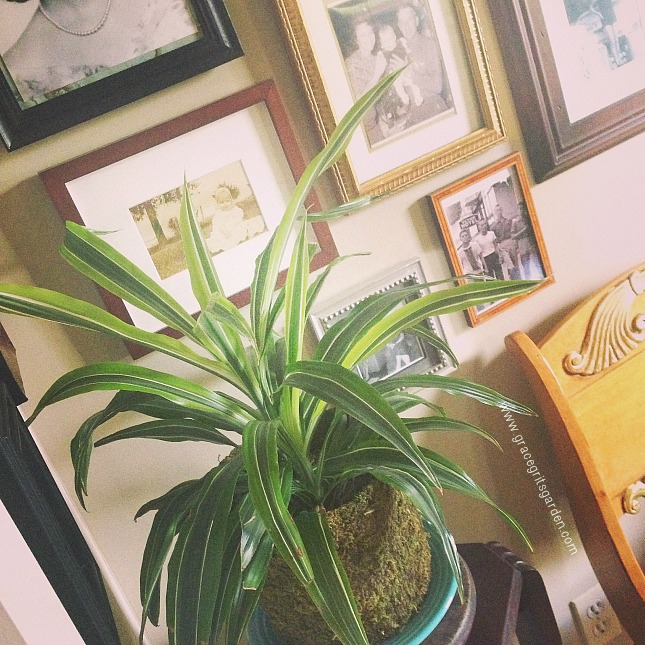
The plant in the corner softens the whole look plus adding something alive always makes me happy. (SaraBeth if you are reading this, your plant is doing well!)

how to arrange a photo display

This look may not be for everyone, but after stressing about it (and calling in my sister-in-law for her opinion), I’m enjoying the final result. Plus I love having our family members together in one place.

photo wall display

Now, you know those photos you’ve been meaning to hang forever? Get to it.

Grace Grits and Gardening

Farm. Food. Garden. Life. 

“A photograph shouldn’t be just a picture, it should be a philosophy.”
― Amit Kalantri

Musical Pairing:

Paul Simon, Kodachrome

Yum Yum Cake – old southern recipe!

October 9, 2014 By Talya Tate Boerner

Keiser’s Kitchen Cookbook

Last week I decided I would begin making recipes from the Keiser’s Kitchen cookbook, a cookbook compiled in 1969 by the Keiser Elementary School PTA moms as a Halloween fundraiser. First up: the Yum Yum Cake, a recipe submitted by Cleo Woodard. 

Yum Yum Cake! vintage recipe

Mrs. Woodard was a friend of my Nana’s. They were both members of the Sunshine Club. Although I know zero about the Sunshine Club’s mission, I bet the ladies did selfless things for the area and took turns bringing amazing desserts (like the Yum Yum Cake) to eat while discussing issues of the day. I remember snippets about Mrs. Woodard mainly because my sister and I, along with several of our friends, took ballet lessons in her home from her daughter, Annelle.

ballet lessons back in the day

That’s me on the far right side wearing green. My sister is on the opposite side wearing the matching outfit in orange. We always matched. Always.

My best friend, Anita, is standing beside me with the perfectly pointed toe. There’s more I could say about this picture, but I should get on to the recipe. It’s a keeper.

Yum Yum Cake

(One thing to note about this and many of the dishes in the Keiser’s Kitchen cookbook…recipes call for margarine or oleo. I never buy margarine, and I’m not sure what oleo is. I substituted unsalted butter 1:1 with no problem.)

making the Yum Yum Cake

Yum Yum Cake

Print Recipe
Ingredients Method

Ingredients
  

  • 2 cups self-rising flour
  • 2 eggs
  • 2 cups sugar
  • 2 teaspoons baking soda
  • 2 cups crushed pineapple drained
Icing
  • 1 cup sugar
  • 1 stick margarine I used butter
  • 1 small can Pet milk 5 oz
  • 1 cup coconut
  • 1 teaspoon vanilla
  • 1 cup chopped pecans

Method
 

  1. Mix all ingredients and pour into a greased 9x13" pan.
  2. Bake for 25 minutes or until it tests done in a 350 degree oven.
  3. Ice while still warm.
Icing
  1. Boil sugar, margarine and milk for two minutes (stir constantly).
  2. Remove from heat. Add coconut, vanilla and pecans.
  3. Pour over cake while still warm.

making Yum Yum icing

This cake lives up to its name. In fact, I think it should be called the Yum Yum Eat Em Up Cake. It tastes a bit like pineapple upside down cake. The icing makes it super moist and gooey. I’m pretty sure I said “yummmmmmmm” at least once while tasting it.


You will too.

Yum Yum Cake!!


Grace Grits and Gardening
Farm. Food. Garden. Life.


Keiser’s Kitchen – a foodie blast from the past

October 3, 2014 By Talya Tate Boerner

Fall in the part of the Delta where I grew up meant harvest, football and countdown to the Keiser Halloween Carnival. Friends, it was THE big event in our little town. I’ve written about my reign as Halloween Queen HERE if you’d like to get background information. The thing to know for purposes of this post is that the PTA mothers raised money for the school primarily so their kid and class representative could wear the coveted cardboard glittery crown.

Grace Grits the Halloween Queen

A.BIG.DEAL.

Way back in Nineteen Hundred and Sixty-Nine (gasp), the year I was nominated Queen of the second grade class, our most successful fundraiser was the Keiser cookbook, aptly named Keiser’s Kitchen.

Keiser's Kitchen

This cookbook belongs in a museum showcasing middle twentieth century PTA Mom handiwork.

Way before computers and high speed copy machines and your choice of cool fonts, regular construction paper covers were cut to size, manually stapled and hand lettered using a Bic marker. Someone (probably Momma) collected and typed the recipes on a clunky manual typewriter before running them off on the mimeograph machine in the teacher’s lounge. And I’m sure there was sniffing. Sniffing the mimeograph paper was the reward at the end… (if you don’t know what I mean, you are showing your young age.)

What a labor intensive project compared to today’s technology.

Our copy of Keiser’s Kitchen is priceless.

During the upcoming fall weeks, I plan to recreate these dishes as presented (along with maybe a little story about the Keiser mom who originally submitted the recipe). There are over thirty recipes, so I won’t do all of them because really, how many Jell-o salads does one need? But I plan to make lots of them. I think we need to remember these recipes, taste this simple, basic food lovingly made by our mothers who saw to it that we gathered around the supper table every night for a family meal.

I’ll warn you now, there will be no salted caramel frosting or balsamic anything. But sometimes maybe that’s what we need.

Stay tuned!

Grace Grits and Gardening

Farm. Food. Garden. Life.

Keiser's Kitchen cookbook


« Previous Page
Next Page »


Hi! I'm Talya Tate Boerner. Writer, Reader, Arkansas Master Naturalist / Master Gardener, Author of

THE ACCIDENTAL SALVATION OF GRACIE LEE (2016)

GENE, EVERYWHERE: a life-changing visit from my father-in-law (2020)

BERNICE RUNS AWAY (2022)

THE THIRD ACT OF THEO GRUENE (coming 2025)

Recent Ramblings:

  • Sunday Letter: 11.23.25
  • Maggie and Miss Ladybug: My New Children’s Nature Book
  • Sunday Letter: November 9, 2025
  • Sunday Letter: Oct 26, 2025
  • Sunday Letter: Oct 5, 2025

Novels:

Coloring Books:

Fiction-Themed Coloring Books

Backyard Phenology:

Children’s Nature Book:

Never miss a blog post! Subscribe via email:

Looking for something?

Categories

All the Things!

A to Z April Blog Challenge Autumn BAT Book Reviews childhood Christmas creative writing prompt Dallas Desserts Fall Fayetteville Food Gracie Lee Halloween Hemingway-Pfeiffer holiday recipes home humor Johnson Family Keiser Lake Norfork Lucy and Annabelle Mississippi County Mississippi Delta Monarch butterflies Munger Place Nana nature Northeast Arkansas Northwest Arkansas Osceola poem Reading Schnauzer simple living simple things spring spring gardening Summer Talya Tate Boerner novel Thanksgiving The Accidental Salvation of Gracie Lee Thomas Tate Winter Wordless Wednesday

Food. Farm. Garden. Life.

THANKS FOR READING!

All content and photos Copyright Grace, Grits and Gardening © 2025 · Web Hosting By StrataByte