A month or so ago, I spent the day with my blogger friend Gina. “You should do a guest post for me sometime,” I said. “I’d love too!” she said. And drum roll… Here she is! Please welcome Gina and show her some Grace Grits love. Yay!
Hey, y’all! I’m Gina from Desperately Seeking {Gina} and I am so thrilled to be here in Talya’s space today.
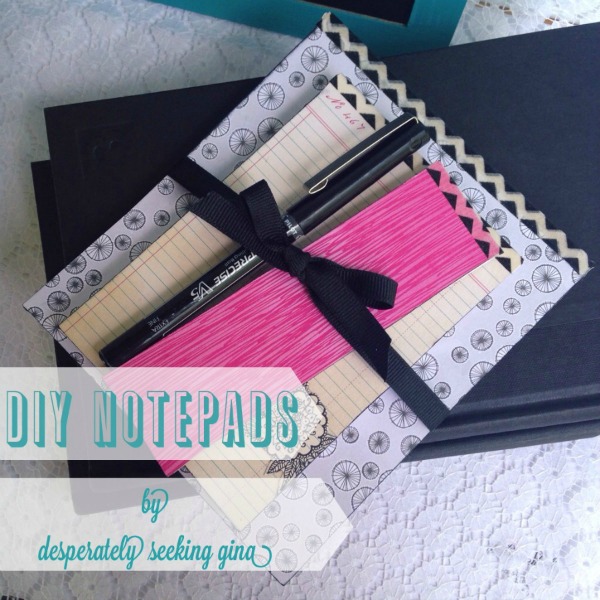
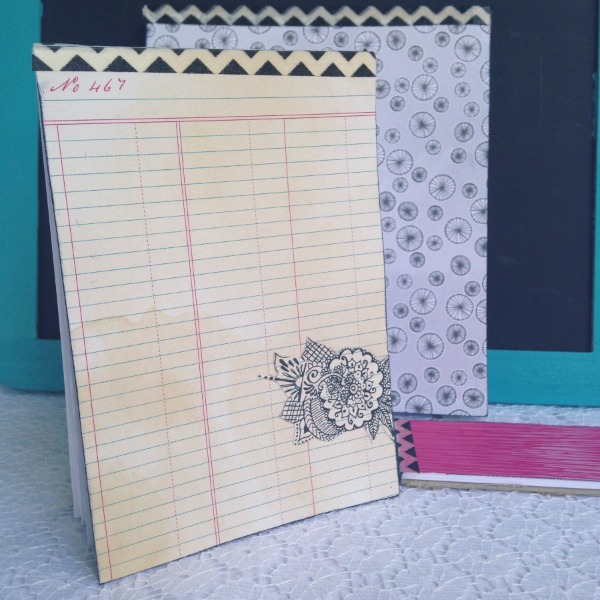
If there’s one thing to know about me, it’s that I love to craft. And also, I love paper. Currently, there are no less than fifteen decorative blank notebooks and decorative journals sitting in a drawer waiting to be journal-ed, or filled with grocery lists, hopes, dreams-well, you get the idea. I love them all. Imagine my delight when I figured out how to craft my own adorable and useful notepads. Today, I want to show you how to make your own DIY notepads. I hope you enjoy, and I’d love to see your creations.
Gather:
paper
cardboard (or pieces of cut-out cereal boxes)
decorative scrapbook paper
decorative tape
PVA glue (special glue for bookbinding-dries clear and stays flexible)
Decoupage glue (I use Mod Podge)
ink pads in matching colors (optional)
foam brushes
razor knife
2 paint stirrers or 2 narrow rulers
assorted clamps (clips or C-clamps) or heavy objects to use as weights
The How-to:
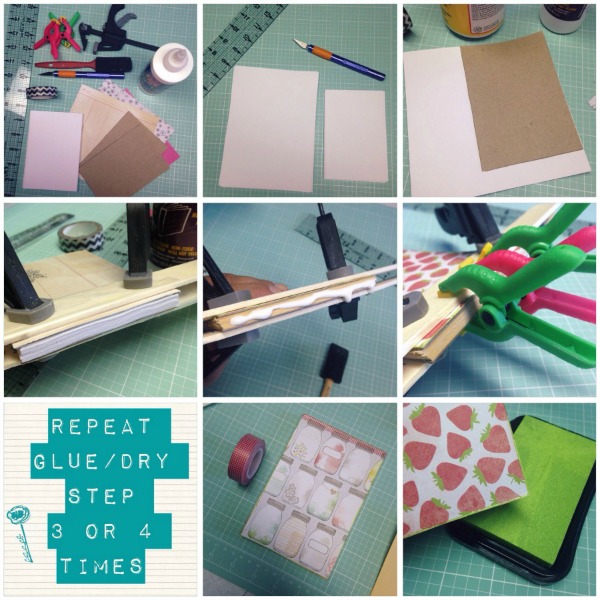
1. Gather supplies
2. Cut paper and cardboard to desired proportions.
3. Optional: You may add a paper-covered cardboard cover to the top (use Mod Podge to glue)or just use the decorative scrapbook paper as the cover.
4. Assemble the cover, papers, and the cardboard backing. Place paint stirrers or rulers on either side of your notepad and secure with clamps. I love these handy plastic C-clamps.
5. Apply PVA glue liberally along the top of the notepad being sure to cover the entire edge of paper, cover, and cardboard backing.
6. Allow to dry according to PVA directions, normally around 10 minutes. I added extra clamps to the middle to ensure the entire length of paper and covers were squeezed together tightly.
7. Repeat steps 5 & 6 three or four more times drying thoroughly each time.
8. For added cuteness, apply decorative tape (I used Washi Tape) to the top edge covering the clear-dried glue.
9. Ink edges in a coordinating color using stamp ink pads to finish off your notepad.
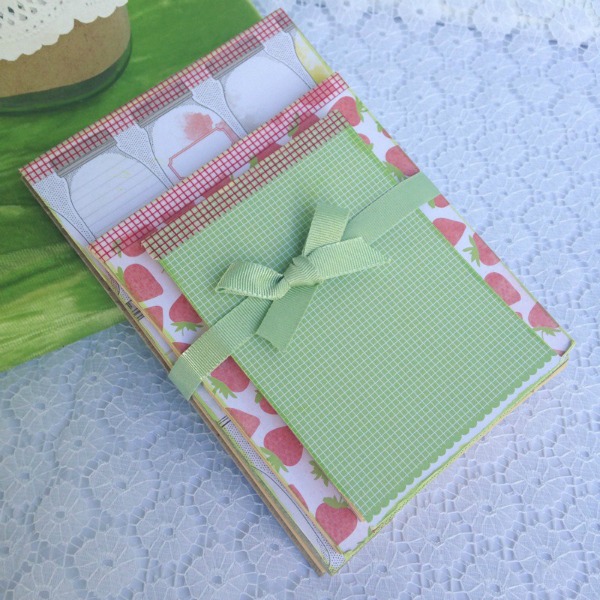
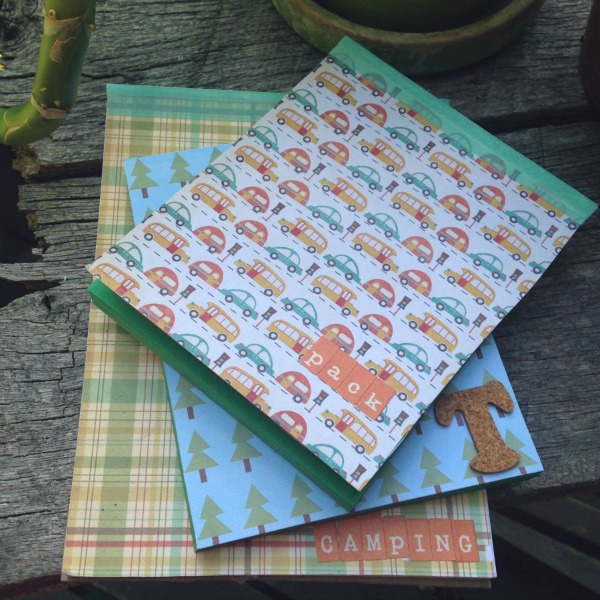
These are so fun to make! Addictive, even. Make assorted sizes with coordinating covers and stack together. Tie with pretty ribbons. These make excellent gifts for writer friends-just be sure to make plenty for yourself!
I’d love to see what you create. Connect with me at my blog Desperately Seeking {Gina} or on Facebook and see what I’m currently up to over at Instagram. Thanks so much to Talya for having me over!
Aren’t these notepads adorable? Thanks Gina!!

#Palsies
Grace Grits and Gardening
Food. Farm. Garden. Life.


Morning Gina. I enjoyed your blog this morning. You are making some very pretty things. I may try these.
Thank you, Barbara 🙂 I hope you give them a try. They’re so easy and only take a few supplies-my favorite kind of craft!
I admire you and others that have the patience and the talent to be so creative. Your notepads are beautiful.
Thanks, Colene! Patience is definitely something new to me, believe it or not. The older I get the more patience I get…it’s kind of amazing-lol.
wow this came out so so pretty! I love them all!
Thanks, Taylor! I’m sort of obsessed with scrapbook paper and I need to use up my supply 🙂
I love scrapbook paper too!!
I love your notepads, Gina. I have lots of pretty notebooks, card stock and papers, too. I can’t resist, especially when I find them on sale. I think I’ll try out your notepad technique. Thanks!
Love this project! So cute!
Oh, Gina, these are gorgeous!!!