grace grits and gardening

ramblings from an arkansas farm girl

  • Home
  • Bio
  • Publishing
  • SHOP!
  • Garden
  • Food
  • Reading & Books
  • Sunday Letter

How to make Creme Brûlée

March 22, 2014 By Talya Tate Boerner

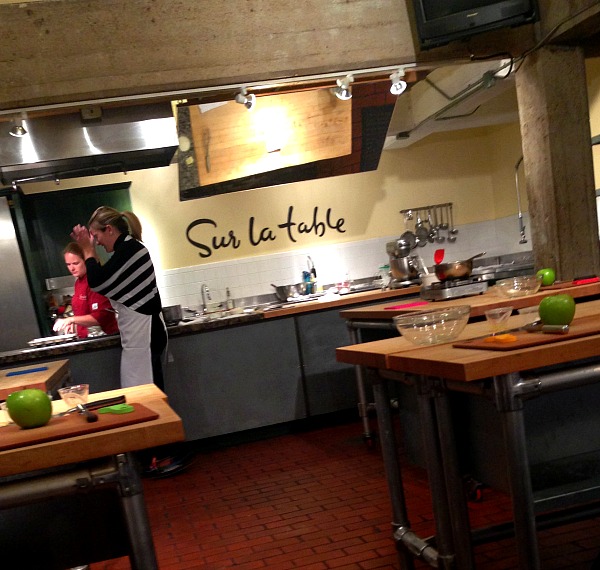
Last weekend I attended a cooking class at Sur La Table—Four Desserts Everyone Should Know How To Make… I would have signed up for the creme brûlée alone. Can we agree, creme brûlée is heaven sent?

creme brûlée

I’m lucky to live smack dab between two great cooking schools (Sur La Table and Central Market), and I take advantage of this as often as possible. Here’s the thing about cooking classes—learning to make a dish hands-on with a chef is so much more educational than simply reading the recipe at home. Nuances and special tricks may not come across in print. Plus being surrounded by a chef kitchen and playing with all those cool utensils is a huge bonus.

Sur La Table, Dallas

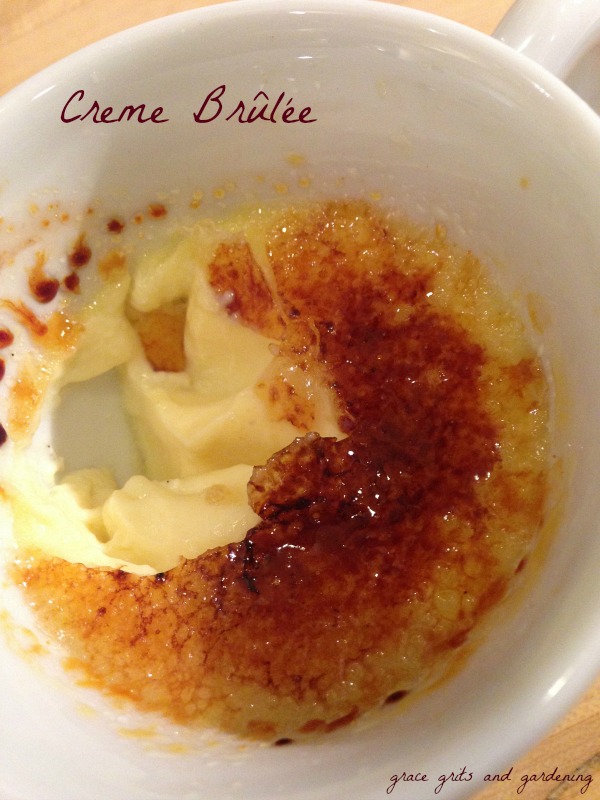
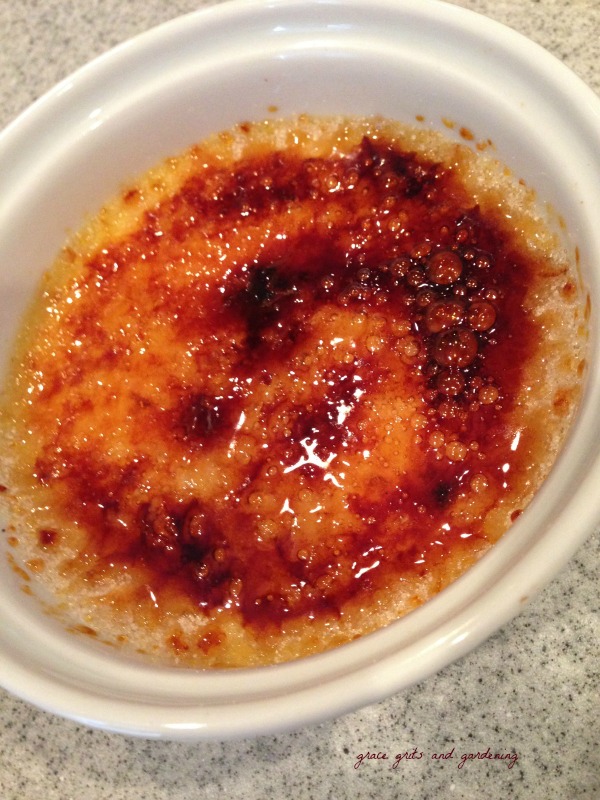
Yesterday was my final exam as I attempted to recreate creme brûlée in my own kitchen with my (not so cool) utensils. I gave myself a solid B+.  (I would have made an A, but I got a bit carried away with the final sprinkle of sugar ascribing to the more is better theory.) Overall the taste was spot-on,  the texture creamy,  the molten caramel crisp. Yes, I’m patting myself on the back.

This recipe really is simple. I can’t believe I waited so long to learn. (Recipe courtesy of Sur La Table.) 

Creme Brûlée

Print Recipe
Ingredients Method Notes

Ingredients
  

  • 1 cup whole milk
  • 1 cup heavy whipping cream
  • 8 egg yolks
  • 1/3 cup plus 2 extra tablespoons to top granulated sugar, divided
  • 1/2 teaspoon salt
  • 1 teaspoon vanilla paste

Method
 

  1. Preheat oven to 350 degrees. Move oven rack to the center.
  2. Pour milk and cream into a small heavy saucepan and heat to scald over medium-high heat. To scald, heat until bubbles begin to form around the edge of the pan. Remove pan from heat.
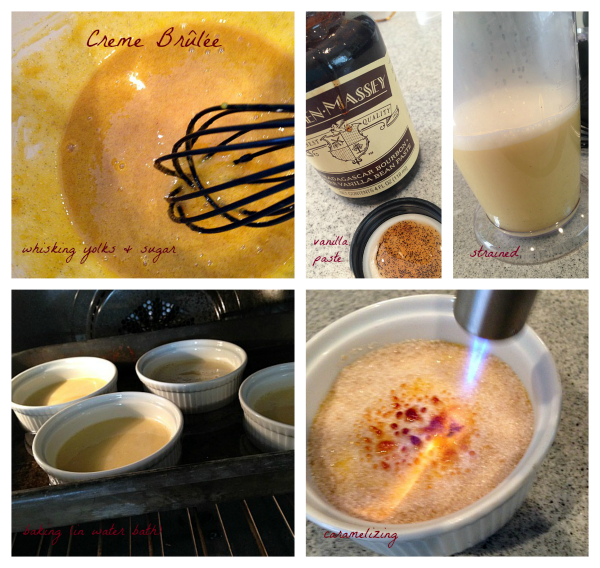
  3. In a large mixing bowl, whisk together eggs, 1/3 cup sugar, salt and vanilla paste. While whisking, slowly pour hot milk mixture into the egg mixture. Do not stop whisking. Whisk until the mixture is smooth. (If you do this too quickly, the eggs will cook upon contact with the hot cream mixture.) Pour the mixture through a fine-mesh sieve into a large measuring cup with a spout to remove any overcooked egg pieces. (There will be a few tiny bits.) This will also help accelerate the cooling down process.
  4. Place 6 (4 ounce) ramekins inside a rectangular baking dish and fill the ramekins with the custard mixture.
  5. Using hot tap water, pour enough water into the baking dish to reach half-way up the side of the ramekins. This hot water bath will insulate the custard and keep the eggs from cooking too fast.
  6. Bake about 40 minutes until the custard trembles or wobbles when gently shaken. If the mixture doesn't appear to be set, continue baking a few minutes more while monitoring.
  7. Remove ramekins from the water bath, place on a cooling rack for 30 minutes, then transfer to the refrigerator to set.
  8. Before serving: Sprinkle the surface of each custard with 2 teaspoons of the remaining sugar. Shake the cup to gently distribute the sugar evenly—make sure it covers the custard completely. Any exposed custard will blacken under the torch's flame. Light the torch, move the flame over the sugar in a circular motion until most of the sugar has melted and looks like tiny water droplets. Continue heating until the sugar turns a deep golden brown. The molten caramel will bubble and smoke then solidify into a crisp surface as it cools. Refrigerate 10 minutes before serving.

Notes

If you don't have Vanilla Paste, buy it. The ratio is the same as Vanilla Extract, but Vanilla Paste leaves the vanilla bean flecks in whatever you are cooking.
If you don't have a torch for caramelizing, you can use a broiler. But a torch is fun.

how to make creme brûlée

how to make creme brûlée

Grace Grits and Gardening

P.S. Freeze all those egg whites you won’t need for this recipe and make angel food cake later…

“I think every woman should have a blowtorch.”
― Julia Child

Easy Buttermilk Tart

January 1, 2014 By Talya Tate Boerner

Easy Buttermilk Tart Recipe. Beautiful too!


I made this tart for New Year’s Eve.

Delicious!

I’m NOT a baker, so if I can make this anyone can.

One reason this turned out so beautifully is my special tart pan. It makes the edges perfectly shaped. I highly recommend you get one because you’ll want to make this over and over again.

How to make a Buttermilk Tart - Tart Pie Pan makes it perfect!
William’s Sonoma Tart Pan

Ingredients

Pillsbury Pie Crust (the kind that unrolls…)

1 stick unsalted butter, melted and cooled
3 eggs at room temperature
1/4 cup buttermilk
2 T all-purpose flour
1 3/4 cups granulated sugar
1/2 tsp pure vanilla extract
1/2 tsp salt

Buttermilk Tart made with Pillsbury Pie Crusts
These are my favorite pie crusts. I’ve stopped trying to make my own…

Method

Preheat oven to 350 degrees.

Place pie crust in tart pan. Press around sides and try not to stretch the dough which causes shrinkage while baking. To cut the edges from the crust, roll your rolling pin over the edge of the tart pan. Excess crust will fall away.

Place tart pan in the freezer to chill crust while you mix ingredients.

Add eggs to melted butter and whisk. If your butter is still warm, temper the eggs by adding a tiny bit at a time—otherwise you’ll have scrambled eggs.

Add buttermilk and vanilla to the butter/egg mixture and mix well.

In a separate bowl, combine flour, sugar and salt. Stir the dry mixture into wet mixture a bit at a time until mixed. Don’t over mix.

Pour the filling into the crust and bake on the middle rack until set and lightly browned, about 45 minutes. Cool to room temperature on a rack.

Serve with a sprinkle of powdered sugar and berries.

Enjoy!

talya

Grace Grits and Gardening
Farm. Food. Garden. Life.

Recipe courtesy of Central Market Cooking School, adapted from Southern Memories by Nathalie Dupress.

P.S. For Williams Sonoma coupons and deals, click HERE. This is not a sponsored ad. All opinions are my own.

Chocolate Covered Cherry Christmas Mice

December 6, 2013 By Talya Tate Boerner

chocolate covered cherry Christmas mice - Fun to make and eat!
I’ve been making these chocolate covered cherry Christmas mice several years now. They are fun to make and always a big hit at every holiday gathering.


Ingredients (makes 18-24)

8 oz Melting Chocolate (I used Ghirardelli semi-sweet)
1 medium jar Maraschino Cherries with stems
Mini Chocolate Chips
Hershey’s Kisses
Wax Paper
Red Gel Icing

chocolate covered cherry christmas mice - ingredients

Method

Melt chocolate in microwave or in double boiler.

how to make chocolate covered cherry christmas mice

Dip cherry in melted chocolate and press against the bottom of a Hershey’s kiss. The melted hot chocolate will stick to the kiss.
Place on wax paper. While still hot, add two mini chocolate chips on the seam between the kiss and cherry, pressing the chips into the melted chocolate. These are the mice ears.

chocolate covered cherry chocolate mice - drying

Let dry on wax paper. (Yes, I used parchment paper coated in Pam because I was out of wax paper…)

Add a tiny dab of red gel icing to the tip of the kiss for the mouse nose.

chocolate covered cherry christmas mice - cute red noses!

You can trim the “tails”. Or not.

Store in an airtight container or in the refrigerator.

chocolate covered cherry christmas mice - adorable!

Aren’t they adorable?!

Grace Grits and Gardening
Farm. Food. Garden. Life.

…”Not a creature was stirring, not even a mouse.” – Twas the Night Before Christmas

« Previous Page
Next Page »


Hi! I'm Talya Tate Boerner. Writer, Reader, Arkansas Master Naturalist / Master Gardener, Author of

THE ACCIDENTAL SALVATION OF GRACIE LEE (2016)

GENE, EVERYWHERE: a life-changing visit from my father-in-law (2020)

BERNICE RUNS AWAY (2022)

THE THIRD ACT OF THEO GRUENE (coming 2025)

Recent Ramblings:

  • Sunday Letter: 11.23.25
  • Maggie and Miss Ladybug: My New Children’s Nature Book
  • Sunday Letter: November 9, 2025
  • Sunday Letter: Oct 26, 2025
  • Sunday Letter: Oct 5, 2025

Novels:

Coloring Books:

Fiction-Themed Coloring Books

Backyard Phenology:

Children’s Nature Book:

Never miss a blog post! Subscribe via email:

Looking for something?

Categories

All the Things!

A to Z April Blog Challenge Autumn BAT Book Reviews childhood Christmas creative writing prompt Dallas Desserts Fall Fayetteville Food Gracie Lee Halloween Hemingway-Pfeiffer holiday recipes home humor Johnson Family Keiser Lake Norfork Lucy and Annabelle Mississippi County Mississippi Delta Monarch butterflies Munger Place Nana nature Northeast Arkansas Northwest Arkansas Osceola poem Reading Schnauzer simple living simple things spring spring gardening Summer Talya Tate Boerner novel Thanksgiving The Accidental Salvation of Gracie Lee Thomas Tate Winter Wordless Wednesday

Food. Farm. Garden. Life.

THANKS FOR READING!

All content and photos Copyright Grace, Grits and Gardening © 2025 · Web Hosting By StrataByte