grace grits and gardening

ramblings from an arkansas farm girl

  • Home
  • Bio
  • Publishing
  • SHOP!
  • Garden
  • Food
  • Reading & Books
  • Sunday Letter

Strawberry Pot Succulents

April 7, 2015 By Talya Tate Boerner

growing succulents in a strawberry pot

We’ve had a recent string of gorgeous days which has provided lots of gardening time. And once I get started…well, it’s an addiction. Check out this strawberry pot I found at the back of our property near the wood shed. I’m all about found objects.

Succulent Strawberry Pot

If you don’t already have a strawberry pot, I bet someone you know has one sitting around collecting water. I tend to believe that strawberry pots are one of those “good ideas at the time” sort of things. Why else would I find one in the woodshed? If you can’t score a free one, pick one up at your local garden or home improvement center. There are a variety of sizes and styles available on-line, too, from basic terracotta to hip and modern like this one at Crate and Barrel.

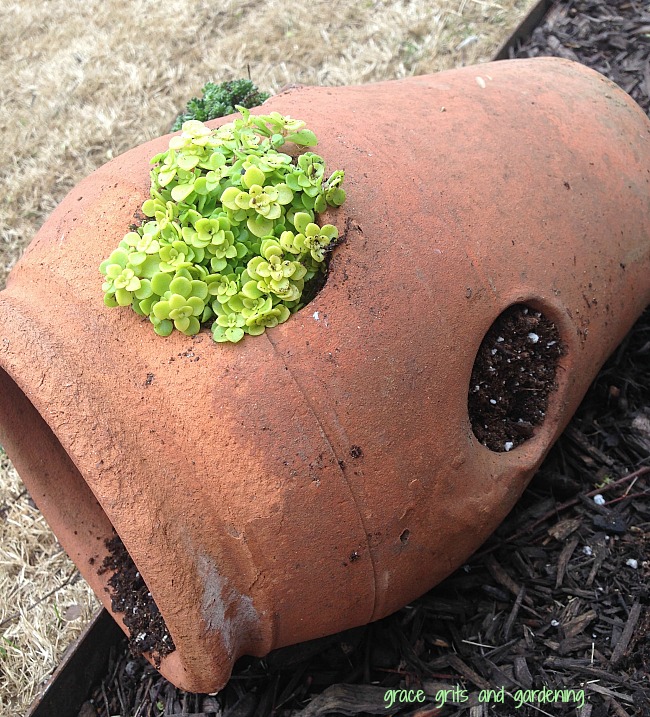
I decided to plant succulents in my strawberry pot. Succulents are easy to grow and come in lots of varieties and shades. Plus, many are perennial. I love the bright green color of this Japanese Stonecrop sedum as well as any blooming flower.

succulents

Japanese Stonecrop


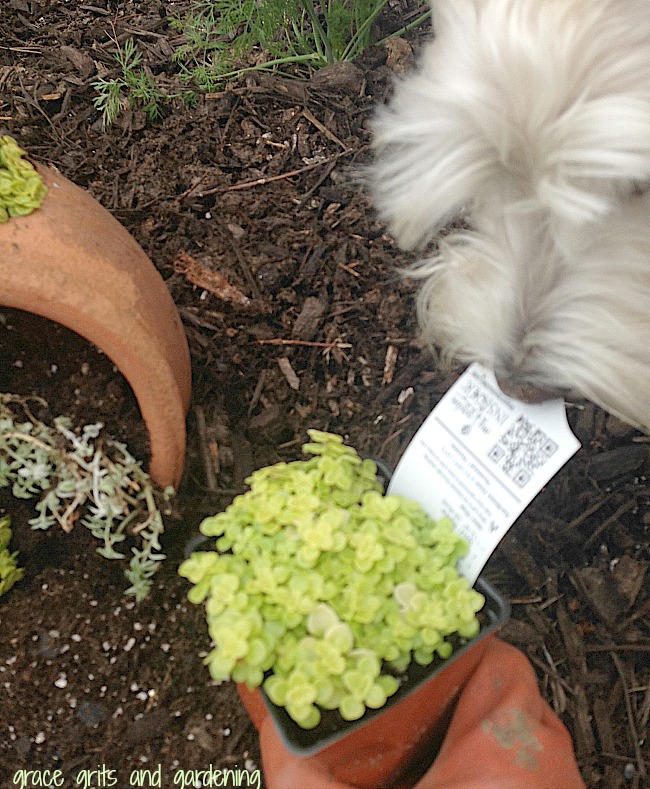
Our schnauzers helped. This would be a great project for kids, too:)

dogs like to garden too

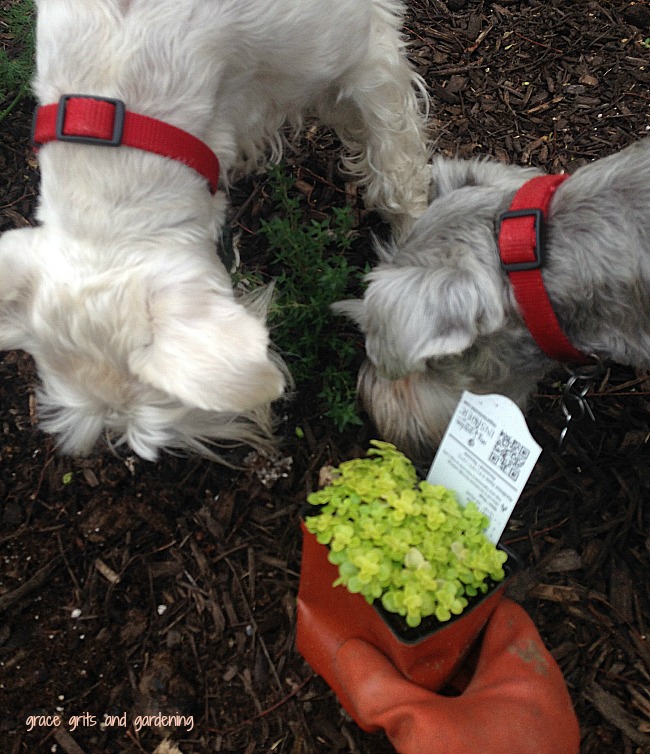
Annabelle removed all the tags while Lucy was in charge of sniffing and hiding the plastic containers around the yard like Easter eggs.

planting a strawberry pot

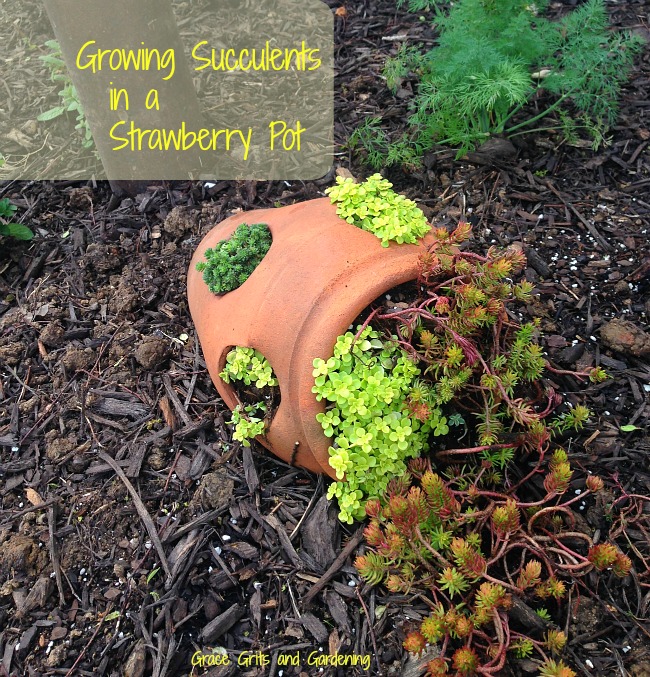
For a different look, I decided to place my strawberry pot on its side. This meant less holes to fill. I learned the hard way to partially bury the pot before beginning to plant. My pot rolled to the edge of the bed. Runaway pot. There’s a joke in there somewhere.

strawberry pot filled with succulents - how to

whoa there! runaway pot…


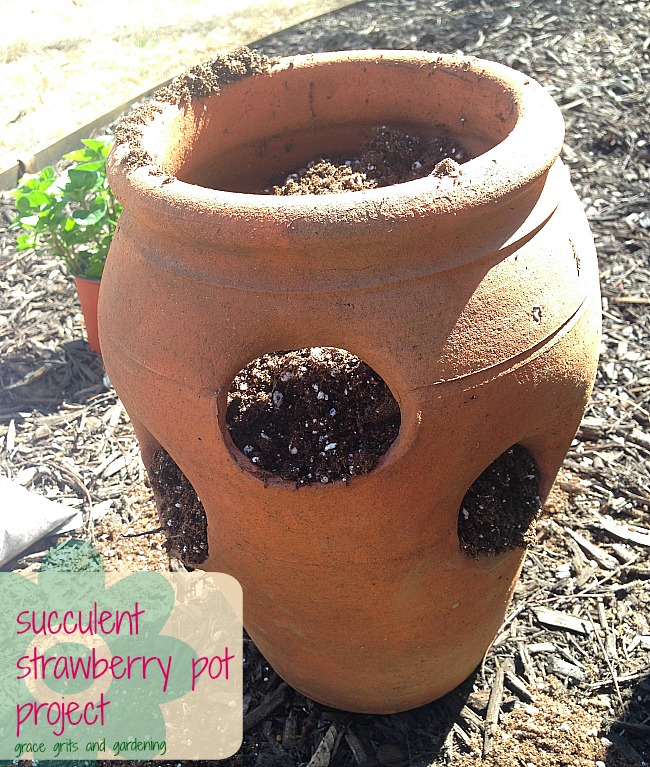
The best way to plant a strawberry pot is to add potting soil up to the first hole. Carefully thread the first plant into the hole (from the outside) and add more soil inside until the plant is secure. Add the next plant and repeat the process. Continue planting in tiers until each (visible) hole is filled. I planted a larger, trailing succulent on top, which turned out to be the side.

strawberry pot full of succulents

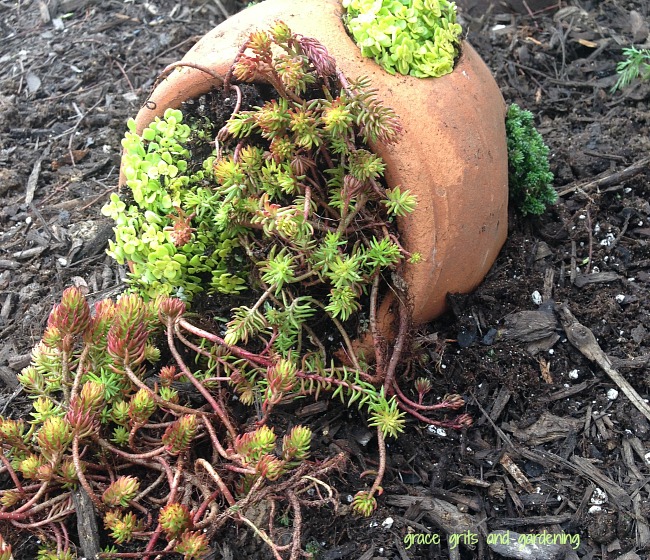
I love the way this sideways buried container has integrated immediately into our (barely planted) herb garden. Eventually, when the bed matures, the strawberry pot will look even more like a natural part of the landscape. Plus, the dogs can’t knock it over, so there’s that.

Happy gardening!

Grace Grits and Gardening

Farm. Food. Garden. Life.

[tweetthis]A fun, child-friendly #garden project-Strawberry Pot Project! #letsgarden #gardenchat @Monrovia [/tweetthis]

Musical Pairing:

They Might Be Giants – Birdhouse in Your Soul

How to: Chinese Fortune Teller

January 27, 2015 By Talya Tate Boerner

Chinese Fortune Tellers, made from regular notebook paper, provided inexpensive, homemade entertainment for my sister and me, especially on Saturday mornings while Momma enjoyed a wash and set and whatever else she did in the name of glamor at Lucille’s Beauty Shop. Yesterday’s child was easily amused, and the Chinese Fortune Teller was super intriguing. Yes, in the back room of the beauty shop (which was really Lucille’s living room), simple finger movements revealed my destiny according to color and number selection.

Life was easy.

how to make a chinese fortune teller

Following the step-by-step instructions HERE, I made a Chinese Fortune Teller, even folding it correctly the first try. Of course I took pictures of my effort along the way because that’s what I do. If you are visual like I am, a picture truly is worth a thousand words.

Chinese Fortune Teller

how to make a chinese fortune teller

In case you don’t remember the rules (or never knew because you are a youngster…), I’ll explain.

1. Choose one of the four colors. (My colors are pink, blue, green and yellow.)

2. Spell the color moving the fortune teller once for each letter. (Your fingers are inside the slits.) Pink = four movements.

3. Pick a number from those showing on the inside.

4. Count out the number, moving the fortune teller once for each number.

5. Pick a final number.

6. Life the flap and do what it says.

chinese fortune teller how to

Let me just say, taking pictures with one hand and working the Chinese Fortune Teller with the other is tricky and results in blurry photos.

There are (at least) three different ways to design your fortune teller.

Activities. I made mine with activities (i.e. each flap has an activity—great for a bored kid or a more fun way to assign chores.)

Answers. You can also design yours so that the inside flaps have basic answers to questions (i.e. “yes” “no” “absolutely” “are you crazy?” – think Magic 8 Ball). In this case, before the player chooses a color, he asks a question.

Fortune. Instead of activities or answers to questions, each flap includes a more traditional fortune. “You will soon receive great news.” That sort of thing.

Decorate your fortune teller however you wish (yes, you can add bling) just remember the outside part has four colors, the inside flaps have eight numbers. Underneath the numbers, eight activities or fortunes are written.

Does any of this make sense? Hope so.

Now I must go write a letter. My Chinese Fortune Teller told me to.

Grace Grits and Gardening

Farm. Food. Garden. Life.

[tweetthis]Remember when fun meant playing with a Chinese Fortune Teller?[/tweetthis]

“Before you leave, the fortune teller reminds you that the future is never set in stone.”
― Erin Morgenstern

Musical Pairing:

Yesterday’s Child – Roy Orbison


Christmas Gift-Wrapping Party!

December 22, 2014 By Talya Tate Boerner

Christmas Gift-Wrapping Party

Last week I hosted my first gift-wrapping party, something I’ve thought about doing for years. Unless you are some sort of party-throwing ninja, it’s too late to arrange a party this year, but keep this fun idea in mind for next Christmas. A gift-wrapping party is the perfect way to spend time with friends and family while knocking out what some folks see as a huge chore—wrapping that growing pile of gifts.

Confession: I love to wrap gifts. I truly do. And sitting around chatting and laughing with friends, listening to Christmas music, drinking a little vino while wrapping Christmas presents elevates gift-wrapping to a new level.

Since I’d never hosted or attended a party quite like this, I did what made sense to me. Everyone left with happy tummies, bags of wrapped gifts, and a little more Christmas spirit, so overall I’d say it was a success.

Invitation.  I created my event on Facebook which is easy and works well if your invitees are Facebookers, but you can invite friends via paper invitations (what?) or e-vite. The important thing is to get the word out in advance because the Christmas calendar fills up FAST with parties and school events. Don’t stress about your invitation. Here’s what I included on my “invitation” which took all of one minute. (Feel free to copy.)

gift wrapping party invitation

Food and Drink. Set up a buffet of hors d’oeurves and a few sweets. Keep the food simple and easy to eat. The point of the get-together is to wrap presents, but let’s be real, a party without food is no party at all. It’s a meeting. Arrange food on the kitchen countertops or island to free up table surfaces for wrapping. My party was a BYOB event, but I had extra wine and beer on hand, along with a few soft drinks and a pitcher of water. Gift-wrapping makes one parched.

gift wrapping party food!

Gift-Wrapping Stations. Designate your dining room table and/or kitchen table for gift wrapping. Pull out leaves in tables to provide as much room as possible. Remove tablecloths, table runners, centerpieces, etc. Add folding tables if necessary. This is serious gift-wrapping business—think Santa’s Workshop… Have rolls of paper within easy reach. And don’t forget tissue paper.

wrapping paper

Ribbon, Paper, Scissors. Since I am a gift-wrapping freak, I already had lots of ribbon and gift tags. Even so, this was a good excuse to pick up cool new paper and embellishments like glittery stars. Flea markets have lots of interesting vintage items for gift decorating. Start collecting now for next year (and forever).

Gift-wrapping supplies become the decorations for your party. Arrange spools of ribbon and tape in bowls (first picture). Egg dishes make great containers for tags, jingle bells, etc. Personal Motto: There’s no such thing as too many egg dishes.

Gift-Wrapping Party necessities.

Wrapping. Wrap until everything is wrapped. Wrap each other’s gifts. Be sure to take pictures. 

gift wrapping party

Leftovers. At the end of the night, if there are leftovers, get them out of the house asap unless you are trying to gain weight over the holidays in which case we can’t be friends. Just kidding (no really). Provide your guests with Ziploc bags or plastic containers for take home treats. 

Alrighty, that’s a wrap on this year’s gift-wrapping party. The best thing about it? When everyone leaves and you are left with the wonderful messiness of a fun evening, your heart is filled with gratitude for a season that brings friends together.

gift wrapping party!

Merry Christmas and may all your gifts be beautifully wrapped. Or at least have fun while wrapping:)

Grace Grits and Gardening

Farm. Food. Garden. Life.

[tweetthis url=”http://wp.me/p58902-1dZ”]The best thing about a #Christmas gift-wrapping party? Bringing friends together + chocolate + wine.[/tweetthis]

[tweetthis]Gift-wrapping makes one parched. #Wine #Friends #ChristmasParty[/tweetthis]

Musical Pairing:

Pretty Paper – Willie Nelson

Gift-Wrapping Party Checklist


« Previous Page
Next Page »


Hi! I'm Talya Tate Boerner. Writer, Reader, Arkansas Master Naturalist / Master Gardener, Author of

THE ACCIDENTAL SALVATION OF GRACIE LEE (2016)

GENE, EVERYWHERE: a life-changing visit from my father-in-law (2020)

BERNICE RUNS AWAY (2022)

THE THIRD ACT OF THEO GRUENE (coming 2025)

Recent Ramblings:

  • Sunday Letter: 11.23.25
  • Maggie and Miss Ladybug: My New Children’s Nature Book
  • Sunday Letter: November 9, 2025
  • Sunday Letter: Oct 26, 2025
  • Sunday Letter: Oct 5, 2025

Novels:

Coloring Books:

Fiction-Themed Coloring Books

Backyard Phenology:

Children’s Nature Book:

Never miss a blog post! Subscribe via email:

Looking for something?

Categories

All the Things!

A to Z April Blog Challenge Autumn BAT Book Reviews childhood Christmas creative writing prompt Dallas Desserts Fall Fayetteville Food Gracie Lee Halloween Hemingway-Pfeiffer holiday recipes home humor Johnson Family Keiser Lake Norfork Lucy and Annabelle Mississippi County Mississippi Delta Monarch butterflies Munger Place Nana nature Northeast Arkansas Northwest Arkansas Osceola poem Reading Schnauzer simple living simple things spring spring gardening Summer Talya Tate Boerner novel Thanksgiving The Accidental Salvation of Gracie Lee Thomas Tate Winter Wordless Wednesday

Food. Farm. Garden. Life.

THANKS FOR READING!

All content and photos Copyright Grace, Grits and Gardening © 2025 · Web Hosting By StrataByte